Manual de referencia
Copyright
This document is Copyright © 2010-2021 by its contributors as listed below. You may distribute it and/or modify it under the terms of either the GNU General Public License (https://www.gnu.org/licenses/gpl.html), version 3 or later, or the Creative Commons Attribution License (https://creativecommons.org/licenses/by/3.0/), version 3.0 or later.
Todas las marcas mencionadas en esta guía pertenecen a sus legítimos propietarios.
Contribuidores
El Equipo de KiCad.
Traducción
Antonio Morales <[email protected]>, 2015-2016
Realimentación
The KiCad project welcomes feedback, bug reports, and suggestions related to the software or its documentation. For more information on how to sumbit feedback or report an issue, please see the instructions at https://www.kicad.org/help/report-an-issue/
Introducción a GerbView
GerbView is a Gerber file (RS-274X format) and Excellon drill file viewer. Up to 32 files can be displayed at once.
For more information about the Gerber file format please read the Gerber File Format Specification. Details about drill file format can be found at the Excellon format description.
Interface
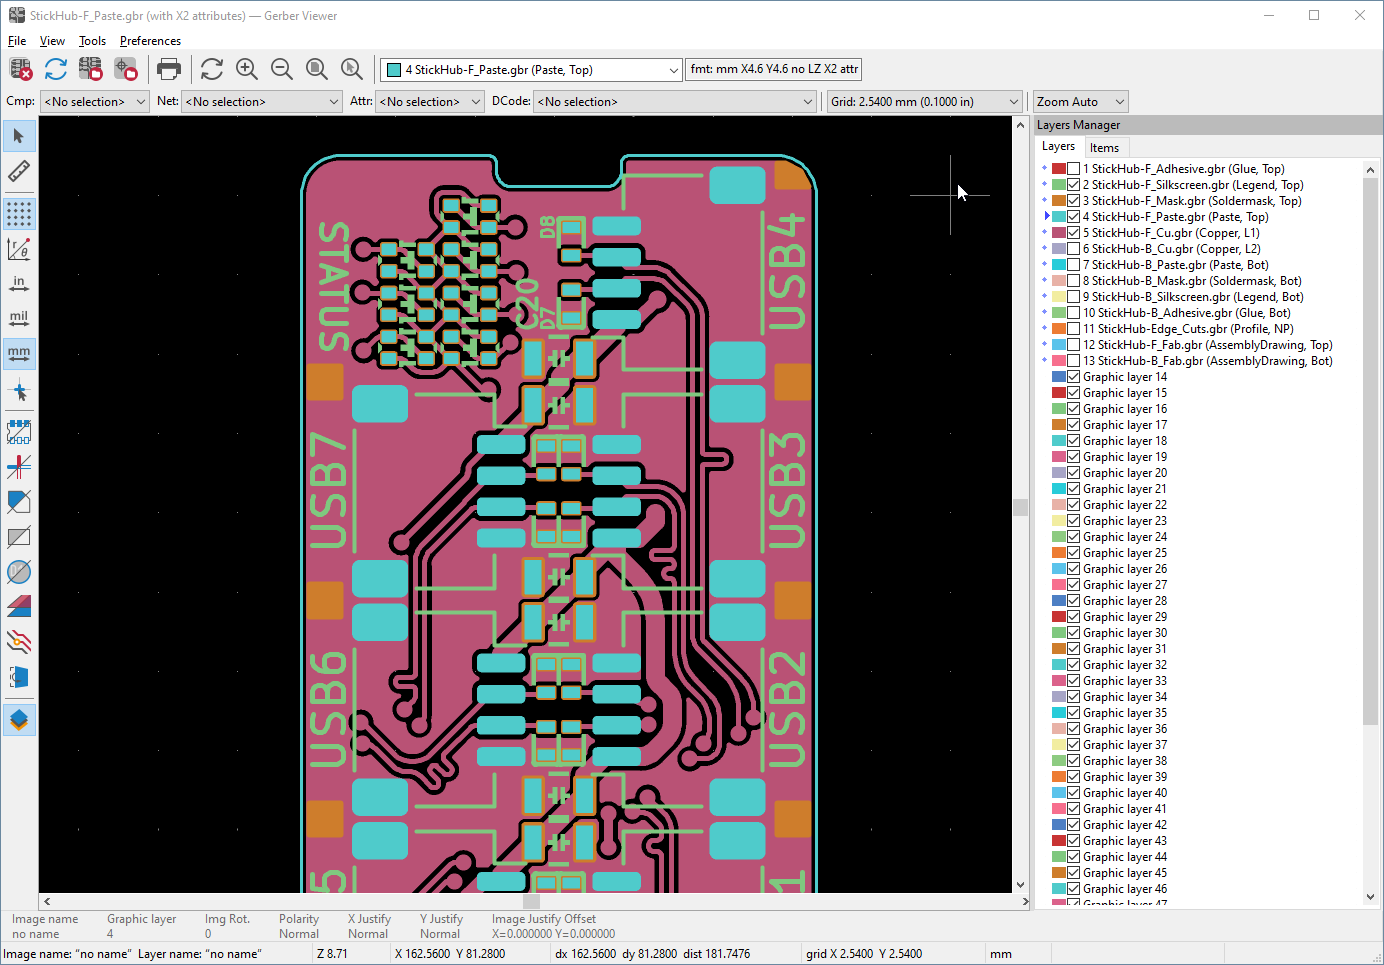
Main window
Barra de herramientas superior
|
Clear all layers |
|
Load Gerber files |
|
Load Excellon drill files |
|
Set page size |
|
|
|
Redraw view |
|
Zoom in or out |
|
Zoom to fit page |
|
Zoom to selection |
|
Select active layer |
|
Display info about active layer |
|
Highlight items belonging to selected component (Gerber X2) |
|
Highlight items belonging to selected net (Gerber X2) |
|
Highlight items with the selected attribute (Gerber X2) |
|
Highlight items of selected D Code on the active layer |


Barra de herramientas izquierda
|
Select items |
|
Measure between two points |
|
Toggle grid visibility |
|
Toggle polar coordinates display |
|
Select inch, mils, or millimeter units |
|
Toggle full-screen cursor |
|
Display flashed items in sketch (outline) mode |
|
Display lines in sketch (outline) mode |
|
Display polygons in sketch (outline) mode |
|
Show negative objects in ghost color |
|
Show/hide D Codes |
|
Display layers in diff (compare) mode |
|
Toggle inactive layers between normal and dimmed display |
|
Show/hide layer manager |
|
Show Gerbers as mirror image |
Layers Manager
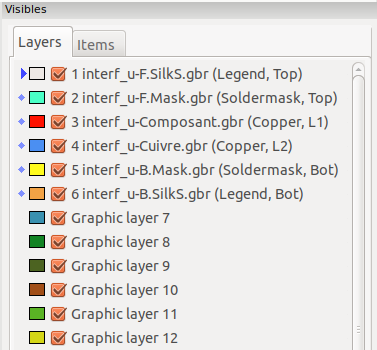
The Layers Manager controls and displays visibility of all layers. An arrow indicates the active layer, and each layer can be shown or hidden with the checkboxes.
Mouse button assignments:
-
Left click: select the active layer
-
Right click: show/hide/sort layers options
-
Middle click or double click (on color swatch): select the layer color
The Layers tab allows you to control the visibility and color of all loaded Gerber and drill layers. The Items tab allows you to control the color and display of the grid, D Codes, and negative objects.
Comandos de la barra de menús
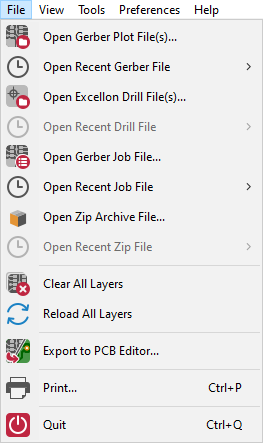
Menú archivo
-
Export to PCB Editor is a limited capability to export Gerber files into a KiCad PCB. The final result depends on what features of the RS-274X format are used in the original Gerber files: rasterized items cannot be converted (typically negative objects), flashed items are converted to vias, lines are converted to track segments (or graphic lines for non-copper layers).
Tools menu

-
List DCodes shows the D Code information for all layers.
-
Show Source displays the Gerber file contents of the active layer in a text editor.
-
Measure Tool allows measuring the distance between two points.
-
Clear Current Layer erases the contents of the active layer.
Printing
To print layers, use the ![]() icon or the File → Print menu.
icon or the File → Print menu.
|
Be sure items are inside the printable area. Use Note that many photoplotters support a large plottable area, much bigger than the page sizes used by most printers. Moving the entire layer set may be required. |